Saturday, 5 October 2013

White Chocolate Raspberry Muffins


WHITE CHOCOLATE RASPBERRY MUFFINS

These are probably my most requested and most made muffins. There are just some flavour combinations that work perfectly, and white chocolate and raspberries are probably my favourite. And in the past couple of weeks I've made these twice. Once for closing night party for my teen's Fringe theatre show, "The Words of Others" and once for the first read of my new show, "Six & Out". Both times, they were eaten very quickly. This always makes me a happy little baker.

These are simple to make and I often make these when I have little time. I often can get up and make these while getting ready to leave in the morning. The batter has almost a lemonade taste and I often take a sneaky spoonful when making it. The only problem with these muffins, you can rarely stop at one.So make them, it'll make you a popular baker too!

INGREDIENTS:

2 cups Self Raising Flour
2/3 cup Caster Sugar
2/3 cup White Chocolate Chips
1 Egg
3/4 cup Milk
125g Unsalted Butter, melted
1 teaspoon Vanilla Essence
1 cup Frozen Raspberries


DIRECTIONS:

1 - Grease a 12 hole muffin pan and preheat oven to 190°c.

2 - Combine flour, sugar, chocolate and raspberries in a large bowl.

3 - Combine egg, milk, butter and vanilla and stir into the flour mix. Don't over mix.

4 - Spoon mixture into pan and bake for 20 minutes, approximately.

5 - Turn onto a wire rack and cool.

6 - Enjoy!

Wayne
xx


Sunday, 29 September 2013

Marble Cake with Strawberry Buttercream Icing


MARBLE CAKE WITH STRAWBERRY BUTTERCREAM ICING

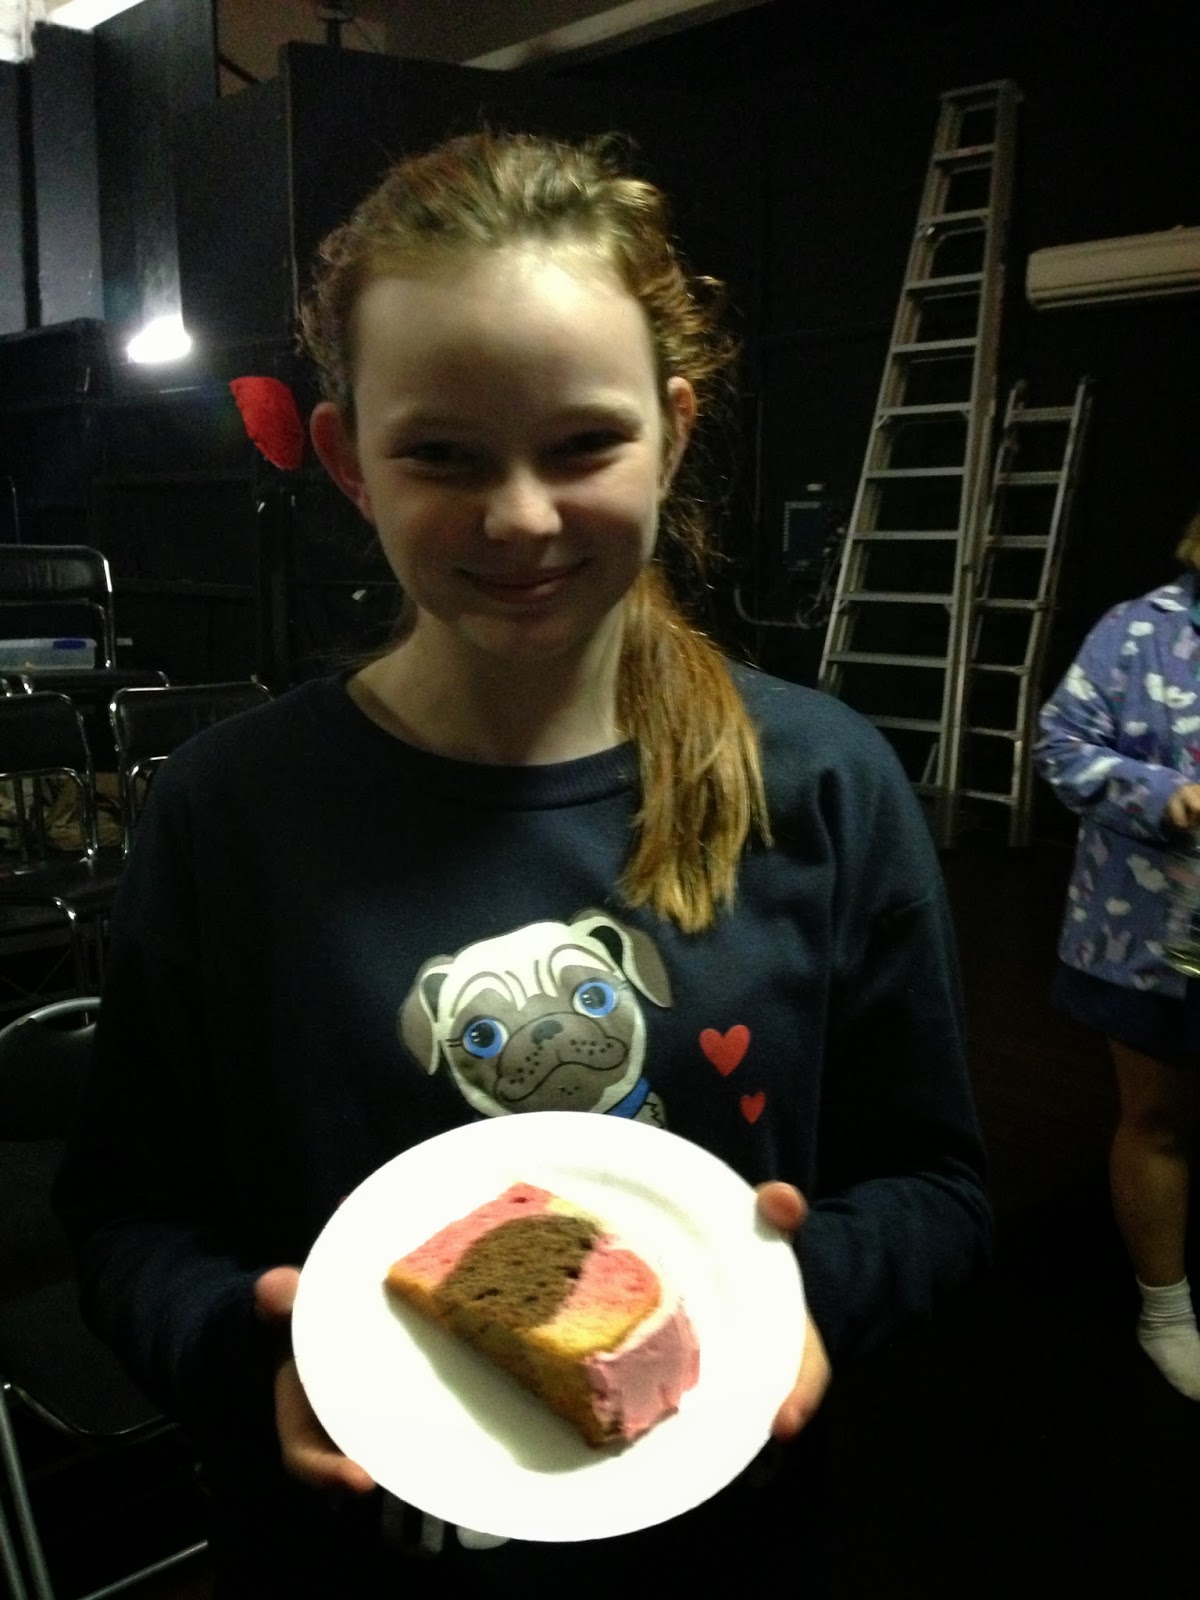
Sorry it's been 2 weeks since I posted but it has been a CRAZY few weeks. Working everyday and every night I had my student show, "The Words of Others". 19 of my teen students were in a show I wrote and directed about self acceptance, bullying and how the words of others effect us. The show was a great success and I was very proud of every single one of my kids.

Now during the rehearsal process, one of my students, Chanda, had her birthday. The actual day of her birthday we had a 4 and a half hour rehearsal in the night. It felt I had to give her a cake to make up for it. I always have a massive amount of bookmarks for recipes on my computer, so I looked through and remembered a recipe I found on the cadbury kitchen website for a marble cake. I knew I'd found my cake with the addition of some buttercream icing.

It's funny how this cake looks like it would be hard to make, but is really quite easy. This is a great cake to make and take somewhere - people will think you're a baking wizard. Have a go and remember to send me your pic - I love to see what people have done with the recipes.


Cake originally from:

INGREDIENTS:

Cake:
125 grams Unsalted Butter, softened
3/4 cup Caster Sugar
2 Eggs
1 teaspoon Vanilla Extract
2 cups Self Raising Flour
3/4 cup Milk
2 tablespoons Cocoa, sifted
1 tablespoon Milk (extra)
Pink Food Colouring

Icing:
125 grams Unsalted Butter, softened
80 grams Icing Sugar, sifted
1 teaspoon Strawberry Essence
Pink Food Colouring
Silver Decorating Balls


DIRECTIONS:

1 - Preheat the oven to 180°c and grease and line a round springform tin.

2 - Cream together the butter and sugar until light and fluffy.

3 - Add the eggs and vanilla and beat well.

4 - Fold in the flour alternatively with the milk.

5 - Divide the mixture evenly into three bowls. Add the cocoa and extra milk to one, the pink food colouring to another, and leave one as is.

6 - Spoon the mixture into the prepared tin, layering the colours.

7 - Bake in oven for 45 minutes or until a skewer comes out clean.

8 - Cool for 10 minutes in pan before turning onto a wire rack to cool completely.

9 - For the icing, cream the butter and icing sugar until creamy.

10 - Add in the essence and colouring and beat until evenly distributed.

11 - Liberally spread across cake and sides and add the decorations.

12 - Serve and enjoy.

Catch you again soon for my most popular muffins.

Wayne
xx


Sunday, 15 September 2013

Oatmeal Raspberry Muffins


OATMEAL RASPBERRY MUFFINS

I do love a good muffin, especially now I bake my own. Before I would only have them at cafes or make horrible packet ones. Since I've discovered they really are the easiest thing to bake, I prefer to eat the ones I make at home. I also love experimenting with loads of great flavours. This is one I've been making since the beginning of the year and is pretty special. I may have been at a friend's place and was looking through a cookbook and saw this recipe and took a snap with my phone. So I apologise for not knowing the original source!

The reason I made these muffins was for auditions for my new play, a double header playing at Revolt in Kensington, Victoria, in late November. My good friend Cas was helping out for the day, so I thought I'd do her some muffins. The photo below shows a muffin in the audition room.

Now these are moist and tasty - raspberries are such a wonderful ingredient. And with the addition of rolled oats, it makes me feel like they're healthy! Almost. So have a go, they are certainly ones to be tried!


INGREDIENTS:
1 cup Rolled Oats
1 1/2 cups Milk
2 cups Plain Flour, sifted
1 tablespoon Baking Powder
1/2 cup Brown Sugar
1 Egg, lightly beaten
1/4 cup Honey
60 grams Unsalted Butter, melted
1 1/4 cups Raspberries (frozen are cheaper)


DIRECTIONS:

1 - Preheat oven to 190°c and grease 12 cup muffin tin.

2 - Put the oats in a bowl, stir in the milk and set aside for 5 minutes.

3 - Sift the flour and baking powder into a large bowl and stir in the sugar. Make a well in the centre.

4 - Put the egg, honey and butter into a bowl and mix well.

5 - Pour the egg mixture and oatmeal mixture into the flour well and stir quickly until just combined. Don't overmix, the batter should be slightly lumpy.

6 - Gently fold in the raspberries.

7 - Spoon the batter into the muffin tin and bake for 20 - 25 minutes.

8 - Cool on a wire tray.

9 - Enjoy!

Wayne
xx


Sunday, 8 September 2013

Banana Bread


BANANA BREAD

Banana bread is something I love to eat. Toasted in a cafe with some coffee and I am a happy man. I have an amazing recipe for banana bread muffins which I make often, but have never made traditional banana bread. That changed last Sunday. I had a shit of a day and came home and needed to release some tension. I had bought a whole bunch of cheap bananas and saw they were getting ripe, so thought baking may help my mood. (And had some wine, it was a good help). So I made this recipe and it was pretty damn fine. I cut pieces every day and took it to work, gave some to the boyfriend as well. It was pretty tasty, and was a good mid morning snack. It is SOOO simple to make and will be a great morning tea for the kids, for you or if you're having people around.

Now I have just included the standard recipe, but you can add other things. Next time I make it I'm looking forward to adding raspberries. Raspberries and bananas are a favourite combination of mine, in fact dessert tonight are those two with vanilla yoghurt. So try that, or other fruits, or maybe if you're feeling naughty, some choc chips. Get into some banana bread folks.
Original Recipe: http://www.taste.com.au/recipes/3118/banana+bread

INGREDIENTS:

265grams (1 & 3/4 cups) Self-Raising Flour
1/4 cup Plain Flour
1 teaspoon Ground Cinnamon
140grams (2/3 cup) Brown Sugar, firmly packed
125ml (1/2 cup) Milk
2 Eggs, lightly whisked
50g Unsalted Butter, melted and cooled
3 overripe Bananas, mashed

DIRECTIONS:

1 - Preheat oven to 180°c. Spray a loaf pan with canola spray and line with baking paper, allow it to overhang.

2 - Sift both flours and the cinnamon into a large bowl. Stir in the sugar and make a well in the centre.

3 - Place the milk, eggs, melted butter and banana in a medium bowl, and stir until well combined.

4 - Add the banana mixture to the flour mixture and stir until just combined. Don't overmix.

5 - Pour the mixture into the prepared pan and smooth the surface.

6 - Bake in oven for 45-50 minutes, or until skewer comes out clean. Remove from oven and set aside for 5 minutes before turning onto wire rack.

7 - Serve and enjoy.

Wayne
xx


Sunday, 1 September 2013

Monte Carlos

 MONTE CARLOS

For this installment I have pulled out a classic. A classic biscuit, and one I have been making for a while and still get requests from friends for. In fact, these pictures are mostly from all different batches. I haven't made these for a month or so, but thought I'd share the recipe as many people have wanted it.

Monte Carlos were always a favourite for me in the Arnott's Classic Creams, I'd always try and claim those when the Tunks family opened a packet. I never realised it included coconut, of course when I found out it seemed obvious. Now I promise if you make these, your friends will be happy. Whenever I do, they go quick. Super quick. I even made some to go with Christmas presents last year. This is one of my favourite recipes - and I hope it's one of yours.

If you make them, please let me know how you go!


INGREDIENTS:

185g Unsalted Butter, softened
1/2 cup Brown Sugar
1 Egg
1 teaspoon Vanilla Extract
1 1/4 cups Self-Raising Flour
3/4 cup Plain Flour
1/2 cup Coconut

Raspberry Jam, for filling

Filling:
60g Unsalted Butter, softened
3/4 cup Icing Sugar
1/2 teaspoon Vanilla Extract
2 teaspoons Milk

DIRECTIONS:

1 - Preheat oven to 180°c and line 2 baking trays.

2 - Cream the butter and sugar until light and fluffy. Add the egg and vanilla and beat well.

3 - Add sifter dry ingredients and coconut and mix well with a large spoon.

4 - Roll teaspoons of mixture into balls and then shape into ovals and place on lined baking trays. Rough up the surface with a fork.

5 - Bake in a moderate oven for 10 to 15 minutes, or until golden brown.

6 - Cool on a wire rack.

7 - For the filling, cream the butter and sifted icing sugar until light and fluffy. Add the vanilla and beat well. Add the milk gradually, beating well.

8 - Put a teaspoon of jam in the centre of half the biscuits and a teaspoon of filling on the other half of the biscuits.

9 - Press both halves together and enjoy.

Wayne
xx

Tuesday, 27 August 2013

Lemon & Lime Shortbread


LEMON & LIME SHORTBREAD

So here's my final installment of baked goodies from my recent party for my idol, Madonna. First there was the great birthday cake, then the Wagon Wheel slice (which coincidentally has quickly become one of my most viewed blogs); and now, here's the great Lemon & Lime Shortbread. Down the bottom I have also included a picture of the sausage rolls I made for the night. They were pretty simple, but oh so tasty. I made mulled wine for the first time too, both will be made several more times!

These shortbread biscuits are quite delicate and have a nice little tang. These are perfect for nice afternoon with a friend, a cuppa tea and the latest gossip. They are quite easy to make, but really make sure you rest the dough in the fridge before rolling out and cutting. It needs that chill to firm up and be easier to roll and cut. There a few stages to this, but it is worth it as they pretty divine.

Go forth and bake my friends. I'll be heading back to some of my old favourites for the next few blogs.

Recipe originally found at: http://www.taste.com.au/recipes/8021/lemon+and+lime+shortbread

INGREDIENTS:

250g Unsalted Butter, softened
1 cup Icing Sugar
1 tsp Vanilla Extract
2 cups Plain Flour
1/2 cup Cornflour
2 Lemons, rinds grated
1 Lime, rind grated and juiced
1 cup Icing Sugar
90g Unsalted Butter, softened

DIRECTIONS:

1 - Line baking trays with baking paper or biscuits liners, I ended up using 3 trays.

2 - Using electric beater, cream butter, sugar and vanilla until pale.

3 - Add flour, cornflour and the rind of the lemons and lime. Stir to combine.

4 - Turn onto a floured surface and knead gently until smooth. Shape shortbread into a 20cm rough circle and wrap in baking powder. Refrigerate for at least 20 minutes.

5 - Preheat oven to 160°c.

6 - Roll shortbread out between 2 sheets of baking paper until 5mm thick. Using a cookie cutter (simpler shapes are best). cut out biscuits. Press remaining together and roll out, cutting more shapes. Repeat process until you are out of dough. Refrigerate for 30 minutes, or until firm.

7 - Bake shortbread for 20 to 25 minutes, or until golden and firm to touch. Cool on trays.

8 - Using an electric mixer, beat icing sugar and butter until pale. Add a tablespoon of fresh lime juice and beat for a further 30 seconds.

9 - Spread icing over the half of the shortbread and sandwich with another shortbread piece.

10 - You can dust with icing sugar if you like.

11 - Enjoy.

Catch you again soon,

Wayne
xxx

Sunday, 25 August 2013

Wagon Wheel Slice


WAGON WHEEL SLICE

The Wagon Wheel Slice had been on my list of things to make for a while but I'd never gotten around to making it. After trying it at my recent Madonna birthday party, I wish I'd done it earlier. It was certainly the favourite for the night with my guests. The wonderful thing is that it does have that taste of the old fashioned Wagon Wheel, but in a delicious slice. There weren't many of them left after the party, but the ones which were I took into work the next day and they disappeared very fast as well. One of my friends who has tasted a lot of my baking said they were one of the best I'd made. Thanks Cas!

I think I held off making them because I thought it was going to be delicate and difficult to make. I'm a pretty robust baker, and have never been described as delicate. But the thing is, when I made these, they were much simpler than I thought. Not at all hard, and parents, you could certainly make these with the kids. Think this could become quite the family favourite for you.

One more biscuit for you guys during the week and then I may go back and blog some of my older recipe attempts. Trying to be good over the next few weeks and drop a few kilos for an upcoming photo shoot I have. But don't worry, baking will never be too far away from me. I'll just have to do a few more push ups to make up for it!


INGREDIENTS:

235g Unsalted Butter, softened
1/3 cup Caster Sugar
1&1/2 cups Plain Flour
1/3 cup Self Raising Flour
1/2 cup Raspberry Jam (I only had Strawberry and still came out well)
145g Marshmallows, white preferred but doesn't really matter - I had to use some pink too
200g Dark Chocolate Melts


DIRECTIONS:

1 - Preheat oven to 180°c and grease and line a slice pan.

2 - Using electric mixer, beat 185g of butter and sugar until light and fluffy. Sift flours over butter mixture. Stir with spoon until dough comes together.

3 - Press mixture into prepared pan. Level and press down with the back of your spoon. Don't over fill (I ended up not using a little of my mixture - as seen in the above picture).

4 - Bake for 20 minutes or until golden. While baking, use scissors to cut marshmallows in half.

5 - Spread warm base with jam. Cover with marshmallows, cut size down. Bake for 2 minutes. Remove from oven. Press down on marshmallows to level surface. Cool completely in tin.

6 - Combine chocolate and remaining butter in a small saucepan over low heat (I used a double boiler saucepan). Cook until completely melted and smooth, don't rush this process. Pour over marshmallows and smooth the top. Refrigerate until set.

7 - Cut in pieces to serve and enjoy.

Catch you during the week with the lemon and lime shortbread in one of the pictures.

Wayne
xx