Showing posts with label homemade. Show all posts

Wednesday, 13 November 2013

Blueberry Muffins


BLUEBERRY MUFFINS

The muffin mania continues! And these are delicious. Blueberry muffins are just something that works. End story. Okay I better write more. Blueberry muffins were the first type of muffin I ever had, I'm pretty sure most people are the same. Those slightly tart berries work so beautifully in cake goodness. I had actually bought a punnet of fresh blueberries and was going to use them for a tart but ran out of time and didn't want them to go to waste. Then I wanted to make something quick for rehearsal, and here we are! Now of course you can use the frozen ones, I usually do. I love to keep big packs of frozen fruit in the freezer to use whenever I like. Whether it's for baking or for dessert with yoghurt.

These are great for when you have friends due soon and nothing to serve them. They are that quick to make. Parents these are also a great for lunchboxes or when kids have some unexpected guests.

That's it for muffins for a little while, got some yummy things coming in the next few blogs. Hope you enjoy them!
 INGREDIENTS:

1 1/2 cups Self Raising Flour, sifted
1/2 cup Brown Sugar
3/4 cup Blueberries, frozen or fresh
1 Egg, lightly beaten
3/4 cup Milk
90grams Unsalted Butter, melted

DIRECTIONS:

1 - Preheat oven to 200°c and spray a 12 cup muffin tin with canola spray.

2 - Mix flour, sugar and blueberries in a bowl.

3 - In a separate bowl, lightly whisk egg, milk and butter together.

4 - Pour the liquid ingredients into the flour and stir with a spoon until just combined. Don't over mix.

5 - Spoon mixture into the prepared muffin pan.

6 - Bake for 15 minutes or until cooked.

7 - Serve and enjoy

xx


Saturday, 5 October 2013

White Chocolate Raspberry Muffins


WHITE CHOCOLATE RASPBERRY MUFFINS

These are probably my most requested and most made muffins. There are just some flavour combinations that work perfectly, and white chocolate and raspberries are probably my favourite. And in the past couple of weeks I've made these twice. Once for closing night party for my teen's Fringe theatre show, "The Words of Others" and once for the first read of my new show, "Six & Out". Both times, they were eaten very quickly. This always makes me a happy little baker.

These are simple to make and I often make these when I have little time. I often can get up and make these while getting ready to leave in the morning. The batter has almost a lemonade taste and I often take a sneaky spoonful when making it. The only problem with these muffins, you can rarely stop at one.So make them, it'll make you a popular baker too!

INGREDIENTS:

2 cups Self Raising Flour
2/3 cup Caster Sugar
2/3 cup White Chocolate Chips
1 Egg
3/4 cup Milk
125g Unsalted Butter, melted
1 teaspoon Vanilla Essence
1 cup Frozen Raspberries


DIRECTIONS:

1 - Grease a 12 hole muffin pan and preheat oven to 190°c.

2 - Combine flour, sugar, chocolate and raspberries in a large bowl.

3 - Combine egg, milk, butter and vanilla and stir into the flour mix. Don't over mix.

4 - Spoon mixture into pan and bake for 20 minutes, approximately.

5 - Turn onto a wire rack and cool.

6 - Enjoy!

Wayne
xx


Sunday, 29 September 2013

Marble Cake with Strawberry Buttercream Icing


MARBLE CAKE WITH STRAWBERRY BUTTERCREAM ICING

Sorry it's been 2 weeks since I posted but it has been a CRAZY few weeks. Working everyday and every night I had my student show, "The Words of Others". 19 of my teen students were in a show I wrote and directed about self acceptance, bullying and how the words of others effect us. The show was a great success and I was very proud of every single one of my kids.

Now during the rehearsal process, one of my students, Chanda, had her birthday. The actual day of her birthday we had a 4 and a half hour rehearsal in the night. It felt I had to give her a cake to make up for it. I always have a massive amount of bookmarks for recipes on my computer, so I looked through and remembered a recipe I found on the cadbury kitchen website for a marble cake. I knew I'd found my cake with the addition of some buttercream icing.

It's funny how this cake looks like it would be hard to make, but is really quite easy. This is a great cake to make and take somewhere - people will think you're a baking wizard. Have a go and remember to send me your pic - I love to see what people have done with the recipes.


Cake originally from:

INGREDIENTS:

Cake:
125 grams Unsalted Butter, softened
3/4 cup Caster Sugar
2 Eggs
1 teaspoon Vanilla Extract
2 cups Self Raising Flour
3/4 cup Milk
2 tablespoons Cocoa, sifted
1 tablespoon Milk (extra)
Pink Food Colouring

Icing:
125 grams Unsalted Butter, softened
80 grams Icing Sugar, sifted
1 teaspoon Strawberry Essence
Pink Food Colouring
Silver Decorating Balls


DIRECTIONS:

1 - Preheat the oven to 180°c and grease and line a round springform tin.

2 - Cream together the butter and sugar until light and fluffy.

3 - Add the eggs and vanilla and beat well.

4 - Fold in the flour alternatively with the milk.

5 - Divide the mixture evenly into three bowls. Add the cocoa and extra milk to one, the pink food colouring to another, and leave one as is.

6 - Spoon the mixture into the prepared tin, layering the colours.

7 - Bake in oven for 45 minutes or until a skewer comes out clean.

8 - Cool for 10 minutes in pan before turning onto a wire rack to cool completely.

9 - For the icing, cream the butter and icing sugar until creamy.

10 - Add in the essence and colouring and beat until evenly distributed.

11 - Liberally spread across cake and sides and add the decorations.

12 - Serve and enjoy.

Catch you again soon for my most popular muffins.

Wayne
xx


Sunday, 25 August 2013

Wagon Wheel Slice


WAGON WHEEL SLICE

The Wagon Wheel Slice had been on my list of things to make for a while but I'd never gotten around to making it. After trying it at my recent Madonna birthday party, I wish I'd done it earlier. It was certainly the favourite for the night with my guests. The wonderful thing is that it does have that taste of the old fashioned Wagon Wheel, but in a delicious slice. There weren't many of them left after the party, but the ones which were I took into work the next day and they disappeared very fast as well. One of my friends who has tasted a lot of my baking said they were one of the best I'd made. Thanks Cas!

I think I held off making them because I thought it was going to be delicate and difficult to make. I'm a pretty robust baker, and have never been described as delicate. But the thing is, when I made these, they were much simpler than I thought. Not at all hard, and parents, you could certainly make these with the kids. Think this could become quite the family favourite for you.

One more biscuit for you guys during the week and then I may go back and blog some of my older recipe attempts. Trying to be good over the next few weeks and drop a few kilos for an upcoming photo shoot I have. But don't worry, baking will never be too far away from me. I'll just have to do a few more push ups to make up for it!


INGREDIENTS:

235g Unsalted Butter, softened
1/3 cup Caster Sugar
1&1/2 cups Plain Flour
1/3 cup Self Raising Flour
1/2 cup Raspberry Jam (I only had Strawberry and still came out well)
145g Marshmallows, white preferred but doesn't really matter - I had to use some pink too
200g Dark Chocolate Melts


DIRECTIONS:

1 - Preheat oven to 180°c and grease and line a slice pan.

2 - Using electric mixer, beat 185g of butter and sugar until light and fluffy. Sift flours over butter mixture. Stir with spoon until dough comes together.

3 - Press mixture into prepared pan. Level and press down with the back of your spoon. Don't over fill (I ended up not using a little of my mixture - as seen in the above picture).

4 - Bake for 20 minutes or until golden. While baking, use scissors to cut marshmallows in half.

5 - Spread warm base with jam. Cover with marshmallows, cut size down. Bake for 2 minutes. Remove from oven. Press down on marshmallows to level surface. Cool completely in tin.

6 - Combine chocolate and remaining butter in a small saucepan over low heat (I used a double boiler saucepan). Cook until completely melted and smooth, don't rush this process. Pour over marshmallows and smooth the top. Refrigerate until set.

7 - Cut in pieces to serve and enjoy.

Catch you during the week with the lemon and lime shortbread in one of the pictures.

Wayne
xx


Tuesday, 20 August 2013

Birthday Letter Cake - Butter Cake with Strawberry Infused White Chocolate Ganache


BIRTHDAY LETTER CAKE - BUTTER CAKE WITH STRAWBERRY INFUSED WHITE CHOCOLATE GANACHE

So I am a pretty big Madonna fan, by pretty big I mean, massive. I like to have a small party for her every year. It's a great excuse to pure some wine, get together with my friends and make some baked goods. I made a number of delightful baked goods this year I'll be posting over the next week. I was keen to try a special cake. I thought I'd make a big "M", this means that others can use the recipe and a letter cake of their own for themselves or a loved one. Now I'm not the neatest decorator, but I give it a good go. And I was pretty happy with the result. You can adjust it yourself for whatever letter you need.

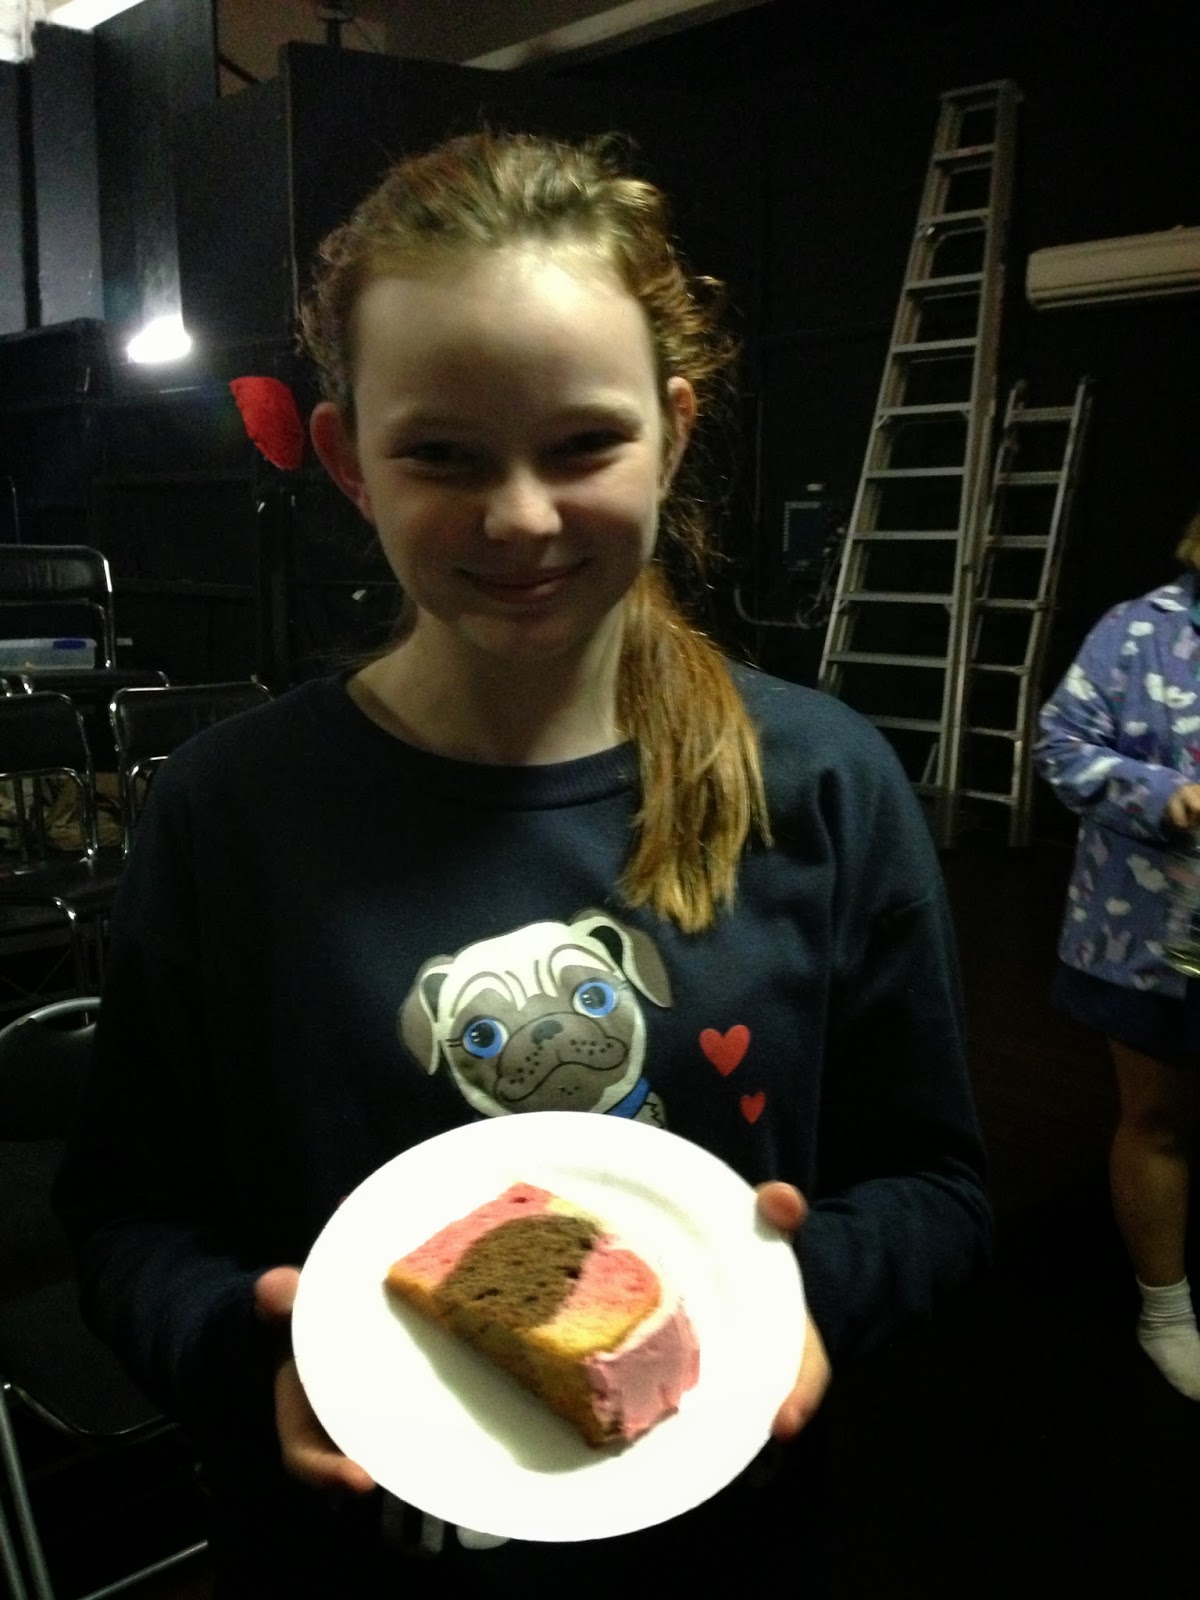
This was a standard butter cake but I replaced the vanilla essence for some strawberry essence and just swirled some red food colouring through the batter. The ganache was the real fun. I infused some cream with fresh strawberries, and it gave the ganache a distinct flavour. I was really happy with it and will definitely experiment with other flavour infused ganache.

This cake is a good recipe for a nice afternoon tea as well. To make enough cake for the large letter cake I made a double batch.

INGREDIENTS:

Buttercake:
185g Unsalted Butter, softened
1 cup Caster Sugar
1 teaspoon Vanilla Essence (or strawberry essence)
3 large Eggs
2 cups Self Raising Flour
1/4 cup Milk
optional Red Food Colouring

Ganache:
300ml Thickened Cream
180g White Chocolate, cut roughly and finely
1/4 cup Strawberries, chopped

Buttercream Edging:
80g Salted Butter, softened
80g Icing Sugar, sifted
Food Colouring

 DIRECTIONS:

Buttercake:
1 - Preheat oven to 180°c and grease cake tins. (I used three loaf pans)
2 - In a large bowl, beat the butter, sugar and essence together with an electric beater until light and creamy.
3 - Add the eggs one at a time and beat well after each addition.
4 - Sift the flour over the mixture alternatively while adding the milk, a third at a time. Stir in lightly until each are mixed.
5 - Spoon in batter into prepared tin/s. You can then add in the food colouring and mix in.
6 - Cook for 50 minutes or until ready (if using smaller pan, make sure you don't overcook).
7 - Cool in pan slightly before cooling completely on wire rack.

Ganache:
1 - Chop up strawberries and mix with cream. Cover and place in the fridge overnight.
2 - Pour cream through a strainer into a small bowl, pressing the strawberries gently to get more flavour through.
3 - Heat cream in a saucepan and slowly bring to a boil.
4 - Pour cream over the chopped chocolate and let it sit for 2 minutes before stirring. (If chocolate doesn't melt, place bowl over another bowl of boiling water and stir until smooth.
5 - Place ganache in fridge until it thickens to desired consistency. Stir occassionally.
6 - Cut cakes into desired shapes and spread ganache over the top. Clean excess ganache from the plate.

Buttercream:
1 - Cream butter and icing cream together until thick and creamy.
2 - Add in colouring, to make purple I used red and blue food colouring, and beat until well combined.
3 - Put the buttercream into a sandwich bag and cut off end. Outline the lettering to make the border.

Place cake in the fridge to set.

This is a fun cake that is tasty and lasts well for a few days. I'll be back on Thursday with the amazing wagon wheel slice that went off a treat on the weekend.

Wayne
xx

Wednesday, 14 August 2013

Raspberry Vanilla Slice


RASPBERRY VANILLA SLICE

Decadence is good word. So is moderation. This isn't one to just make for yourself, it's good to share. I made this for my boyfriend's Dad who hasn't been too well and loves vanilla slices. I also got to share with some of my workmates, my manager has a sweet tooth so I wanted to make sure I saved one for her. These were great to make except I realised too late that they needed a lot of rest time and needed them for Sunday afternoon so I had to come home from seeing a play on Saturday night and start baking at 11.30pm. Another reason I'm sure why my neighbours hate me and my noisy ways.

The great thing about these slices are the raspberries. They add that little bit of freshness and the right level of tartness for a very sweet dessert. The thing I discovered while making them is that they do need a lot of time in the fridge setting. They were best when I'd left them in the fridge the whole day, or even more so, the next day. I also found my icing too runny, so make sure you add more icing sugar if needed.

Never made anything like these before, so was great to do. Think I'll use puff pastry more. My next challenge, to make my own rough puff!


INGREDIENTS:
3 sheets of Puff Pastry, just thawed
1/4 cup Caster Sugar
3 1/2 tablespoons Custard Powder
3 cups Milk
1 Vanilla Bean, split lengthways
300ml Double Cream
125g frozen Raspberries

For the icing:
3 cups Icing Sugar, sifted
3 tablespoons Milk
3 drops Pink Food Colouring


DIRECTIONS:

1 - Preheat oven to 200°c. Line baking trays with baking paper and place 1 puff pastry sheet per tray. Use a fork to prick the pastry. Bake for 10-15 minutes, or until puffed and golden. Set aside on trays to cool.

2 - Combine the caster sugar and the custard powder in a large saucepan. Gradually whisk in the milk until smooth and combined. Add the vanilla bean. Then put on stove top over low-medium heat. Whisk constantly for 5-10 minutes, until the custard boils and thickens. Transfer the custard to a heatproof bowl to cool. Cover with cling wrap to stop skin forming. Discard the vanilla bean.

3 - Line a tray with baking paper. Can use square pan, or I used a brownie pan. Trim the pastry to fit and put in first slice.

4 - Whisk the cream until soft peaks form. Fold in the cooled custard until well combined.

5 - Spoon half the custard mix over the pastry and even out with the back of a spoon. Top with another pastry sheet, gently pressing it down.

6 - Spoon the rest of the custard mix onto the top of the pastry sheet and smooth out again with a spoon. Then place raspberries on top of the custard. Press down the last pastry sheet and cover with plastic wrap. Leave in fridge overnight.

7 - Place icing sugar in a small bowl. Gradually stir in the milk until the icing is smooth and spreadable. Make sure it's not too runny. If it is, add more icing sugar. Transfer 2 tablespoons into a small bowl. Stir in the food colouring into this mixture.

8 - Remove the vanilla slice from the pan. Spread the white icing over the top. Place the pink icing into a small plastic bag and cut off the end, making a small hole. Pipe small lines over the top of the icing. Then use a skewer to create a feathered pattern. Place in fridge to completely set.

9 - Cut into pieces and serve. Keep remaining pieces in the fridge.

10 - Share with friends and enjoy.

I'll have a special birthday cake on Sunday for you all.

Wayne
xx


Monday, 12 August 2013

Apple Cinnamon Muffins


APPLE CINNAMON MUFFINS

I had such big plans to present a lavish looking dessert for you this week. Was all ready and pumped to present to you an apple tarte tatin. I bought a new small frypan and got loads of apples and then made it. While it turned out and tasted quite nice, it was ugly. I was playing with the type of sugar to use and when caster sugar crystalised I thought I'd try brown. Sure it worked, it just made it dark and ugly. So I'll attempt it again soon.

So then I had to think of what else I could make. I had a whole heap of peeled apples left, and then I remembered a friend had recently posted she'd made apple cinnamon muffins. Then I knew I had to make them. Love apples, and cinnamon has become a favourite flavour of mine. These were simple to make and tasted so very moist. The raisins helped and certainly didn't dominate the muffin, just adding to the moistness.

Parents, these are a good lunch box stuffer, there's nothing too bad in them and they are super tasty. If you're not a massive cinnamon fan you can take a teaspoon out, but I say keep it bold. Some recipes call for red apples, but quite frankly I find them bland. The tartness of the green apple is divine and mixes perfectly with the sweet. Enjoy these, I have a very sinful recipe for later in the week.


INGREDIENTS:

2 cups Plain Flour
1 tablespoon Baking Powder
3 teaspoons Ground Cinnamon
3/4 cup Brown Sugar (firmly packed)
2 medium Green Apples (peeled, corred and diced)
125g Seedless Raisins
125g Unsalted Butter, melted and cooled
2 Eggs
3/4 cup, Milk
Toasted Muesli, for top of the muffins


DIRECTIONS:

1 - Preheat oven to 180°c and grease a 12 muffin pan with canola spray.

2 - Sift the flour, baking powder and cinnamon together in a large bowl. Stir in the brown sugar, apples and raisins until well combined.

3 - Whisk together the butter, eggs and milks until well combined.

4 - Add the wet mixture to the dry mixture and stir with a large metal spoon. Mix just until all ingredients are combined. Be careful not to overmix.

5 - Spoon mixture into muffin pan and top with toasted muesli, adds some nice crunch to the muffin.

6 - Bake the muffins for around 20 minutes or until muffins are fully cooked and spring back up when touched.

7 - Let them cool in the pan for a few minutes before cooling completely on a wire rack.

8 - Enjoy.

Catch you during the week.

Wayne
xx


Wednesday, 7 August 2013

White Chocolate and Raspberry Cheesecake


WHITE CHOCOLATE AND RASPBERRY CHEESECAKE

Last Tuesday was National Cheesecake Day. Sure, it's an American thing, but I wanted to celebrate all the same. Plus, cheesecake is my boyfriend's favourite dessert.So I decided to make this cheesecake. Now the result was not perfect, I think mostly because I let the gelatine get too hard. But it was still a nice tasting dessert that was easy to eat - because let's face it, dessert is always amazing to enjoy. I have a whole list of cheesecakes I want to try, so you'll be seeing a few coming up. Any ideas from you which cheesecake I should make next?

If you give this one a try, remember to be careful with the gelatine. Too hot and you'll ruin the ingredients, too cold and it'll set and you'll have lumps and a hard time setting it. But it's worth the trial and error.


INGREDIENTS:

185g Nice Biscuits, crushed
90g Unsalted Butter, melted
500g Cream Cheese, softened
1 can Condensed Milk
100g White Chocolate
1 tablespoon Gelatine
1/4 cup Hot Water
3/4 cup Thickened Cream
150g Raspberries, pureed
Whole Raspberries to top

DIRECTIONS:

1 - Combine biscuits and butter in a food processor and blend till combined. Then press into the bottom of a lined springform tin. Refrigerate until firm.

2 - Beat cream cheese and condensed milk until smooth, then beat in the cream.

3 - Melt the white chocolate over a double boiler on the stove top. Allow to cool to room temperature.

4 - Sprinkle gelatine over hot water and stir to dissolve. Allow to cool.

5 - Beat cooled chocolate and gelatine into the cream cheese mixture and spoon evenly over the biscuit base.

6 - Add the raspberry puree to the top and swirl to make a pattern. Plus add whole raspberries to the top.

7 - Refrigerate before serving.

Catch you on the weekend for some baked goodness.

Wayne
xx

Thursday, 1 August 2013

Rolo Brownie Cake


ROLO BROWNIE CAKE

I just had a massive weekend of birthday celebrations. It seems like a ridiculous amount of us were born in July, me included. Lately as a present to my friends I've been making them birthday cakes. I had two good friends with birthdays last week, so made two lovely cakes (will share the other on the weekend). This cake, the Rolo Brownie Cake, was one I've wanted to make for a while. It's from my favourite blog, Raspberri Cupcakes, and her stuff is always nice - albeit very fattening. Trust me, this is the kind of cake that is divine to eat, but you can't have a lot.

I made it for my friend Jen, a very talented actress and make up artist. She is one of the nicest people I have met since moving to Melbourne. I have directed her twice and have loved getting to know her. I felt very honoured, and very excited to share a small dinner for her special day.

This cake was wonderful to make, I had a lot of fun doing it. The only difficulty I had was with the actual Rolos themselves. I couldn't find the tubes of Rolos, just the block. I rang Nestle, and they told me they didn't makes the tubes anymore. Dumb. Apparently you can get them in import stores still - but I'd left it too late. So I had to do things a little differently. The other different thing to do here is to make your own caramel sauce with a can of condensed milk. This was great and it turned out perfectly.

So have a go at this fun cake, but make sure you share it or you may just explode!

Original recipe from: http://www.raspberricupcakes.com/2012/04/rolo-chocolate-brownie-cake.html

INGREDIENTS:

For the Cake:
400g Salted Butter
200g Dark Chocolate, coarsely chopped
4 Large Eggs
200g Caster Sugar
200g Plain Flour
1 block of Rolo Chocolate
1 can of Condensed Milk

For the Icing:
400g Milk Chocolate, coarsely chopped
300ml Thickened Cream
1 block of Rolo Chocolate


DIRECTIONS:

1 - First you need to make the caramel sauce for the filling. Take the unopened can of condensed milk and remove the label completely. Place in a medium saucepan and fill with water until it is half to 3/4s of the way up to the side of the can. Cover with lid and boil over a medium heat for two hours. Check regularly and top up with water if it falls below half. WARNING - if the water runs out the can will explode. Please don't let that happen (I'll feel really bad). Let it cool, and then put in fridge until you need it. (Will look like pic above)

2 - Preheat oven to 150°c and grease and line 2 springform tins (if like me you only have one, you'll have to take turns cooking them).

3 - Melt butter and chocolate in a heatproof bowl over a saucepan of simmering water. Stir occasionally until smooth.

4 - Whisk eggs and caster sugar in an electric mixer until thick and pale (about 3-5 minutes), fold through chocolate mixture and then fold in flour until just combined.

5 - Pour half the batter in the two pans. Smooth the top and then spread half of the Rolo block to the top of each cake mix.

6 - Bake for 25-30 mins, until cake is firm to touch.

7 - Cool completely in pan before carefully transferring to serving dish. As it's a brownie cake it will crumble easily.

8 - Open caramel tin and add some salt. Use beater to smooth the caramel and mix salt. Then spread completely over the top of one of the cake pieces. Put in fridge for at least half an hour, to make sure it sets.

9 - Carefully sandwich the second cake on top.

10 - To prepare the ganache, place cream in a small saucepan over a medium heat and bring just to boil.

11 - Remove from heat and pour over chopped chocolate (in a heatproof bowl). Leave for 5 minutes and then whisk mixture together. Chill in fridge, stirring every few minutes until it gets thicker.

12 - Spread the ganache liberally over the cake and the side. Break up rolo block and place on top. Refridgerate to set.

13 - Serve and enjoy.

On the weekend, the Coke Chocolate Cake will be put on the blog.

Wayne
xx


Tuesday, 30 July 2013

Mojito Sorbet


MOJITO SORBET

Tuesday has become a great day to bake. I teach a private acting class in the morning and then have the rest of the day free. I always see my great boyfriend, Nick, on Tuesday, and like to make him a nice dinner and dessert. Last Tuesday I decided to make an old favourite for dinner, steak with a roast pumpkin salad. We both love it and I hadn't made it in a little while.

So I needed something to go with it. I wanted something light. With all the birthday parties I'm going to, and all the cakes I was making for them, I didn't want some massively heavy for dessert. Now I know it's still cold out but I hadn't used my wonderful ice cream machine for a while. My extraordinary best friend, Charlene, gave it to me for Christmas and it is marvelous. So sorry for those without one, this recipe uses an ice cream machine. Now I was looking through sorbet recipes and came across this one. Love mint, love lime and well I can confess to moments of being a lush. So the mojito sorbet it was. You can do it without the rum, but then, what fun would that be? It is damn tasty, what a great way to get a little boozy!

Today is National Cheesecake Day in America, so I made a cheesecake I'm taking to my boyfriend's new place tonight. Will give you all the recipe for that one soon. Happy baking my friends and Happy Cheesecake Day. 


INGREDIENTS:

1 cup Water
1 cup White Sugar
1/2 cup Fresh Mint Leaves, packed
1/4 cup Lime Rind, grated
1 cup  Lime Juice
1 1/2 cups Citrus Flavoured Sparkling / Mineral Water
2 tablespoons Rum
(In total I used the rind of 3 limes and used their juice, for left over juice I used a bought squeeze bottle)

DIRECTIONS:

1 - Heat the water, sugar and mint leaves in a saucepan over medium heat, and stir until sugar has dissolved. Bring the mixture to a boil, reduce heat and simmer for 3 to 5 minutes. Set aside to cool and then strain out mint leaves.

2 - Pour the cooled mint mixture, lime rind and juice, sparkling water and rum into a bowl and mix well.

3 - Pour into the container of ice cream maker and freeze until solid. You may need to lift out churner and stir as it can stay liquid underneath. As there is alcohol, freezing time takes a little longer.

4 - Place in freezer until you need it.

5 - Serve in martini glass with fresh mint on top.

6 - Enjoy

Catch you on Thursday with a new recipe.

Wayne
xx 


Sunday, 28 July 2013

Homemade Snickers Bar


HOMEMADE SNICKERS BAR

Last year my boyfriend sent me a recipe, a homemade Snickers bar, that he wanted me to try and make for him. It looked tricky, but I am someone who loves a challenge. So I decided to make these little wonders. They took some effort, but it was worth it as they are divine. D-VINE! I made them the first time and then waited for well over a year to try again, because making this the first time, I heard Whitney Houston died. Now Whitney was my first ever favourite singer. And through the years she still remained someone I loved. So the recipe was tainted slightly, I remember making it while playing Whitney loud and bawling my eyes out.

I made it again for my birthday this year, no one died, and everyone loved it. So I won't hold it against this recipe anymore.This recipe makes a large amount, and because it's so rich you only need to cut small pieces. So I cut it all up for my birthday party and assumed there would be some left over for my Mum to take back to Sydney. I wish I had put some aside, because it all went - very fast! I only got one piece, but it was okay, it made me feel like I'd done a good job. I then also made two trays for my friend Corey's short film and people raved about the slice. I have included the photo of the uncut tray with the other baked goods I made. All tasty!


So here's the recipe. I've done it differently than before. Each layer is listed with its ingredients and directions. Happy baking (even though this one is all done on the stove top.)

Now for making it, I always use a tin tray that I throw out after. I use canola spray to grease it beforehand.

BOTTOM CHOCOLATE LAYER

1 1/4 Milk Chocolate Melts
1/4 cup Smooth Peanut Butter

Melt ingredients together in a heatproof bowl above a saucepan of boiling water. Don't melt too fast, keep flame on a medium heat. Pour into the dish and spread until even. Let cool to room temperature and place in fridge until completely set.


NOUGAT LAYER

60 grams Unsalted Butter
1 cup Granulated Sugar
1/4 cup Evaporated Milk
1 1/2 cups Marshmallow Fluff (included photo above - found in a US sweet store or online)
1/4 cup Smooth Peanut Butter
1 1/2 cups Salted Peanuts, roughly chopped
1 teaspoon Vanilla Extract

Melt butter in a saucepan over medium heat. Add in sugar and milk, stirring until dissolved and bring to boil. Let cook for 5 minutes, stirring occasionally. Add in fluff, peanut butter and vanilla - stirring until smooth. Turn off heat and fold in peanuts, then pour over bottom chocolate layer and spread until it covers it completely. Let cool to room temperature and then cool in fridge until completely set.


CARAMEL LAYER

1 can of Top 'n' Fill Caramel (photo below)
1/4 cup Double Cream

Combine ingredients in a saucepan over low heat. Stir occasionally until smooth and fully combined. Pour over nougat layer and let cool completely. Put in fridge and make sure it is completely set.


TOP CHOCOLATE LAYER

1 1/4 cups Milk Chocolate Bits
1/4 cup Smooth Peanut Butter

Melt ingredients together in a heatproof bowl above a saucepan of boiling water. Don't melt too fast, keep flame on a medium heat. Pour into the dish and spread until even. Let cool to room temperature and place in fridge until completely set.

Cut to size you want and keep in fridge when not eating. Share these round and EVERYONE will love you (or hate you - depending on whether they are on a diet). 

Can't wait till I make these again. If you make them, please send a pic - love to see how they turn out.

Wayne
xx