Showing posts with label birthday cake. Show all posts

Sunday, 29 September 2013

Marble Cake with Strawberry Buttercream Icing


MARBLE CAKE WITH STRAWBERRY BUTTERCREAM ICING

Sorry it's been 2 weeks since I posted but it has been a CRAZY few weeks. Working everyday and every night I had my student show, "The Words of Others". 19 of my teen students were in a show I wrote and directed about self acceptance, bullying and how the words of others effect us. The show was a great success and I was very proud of every single one of my kids.

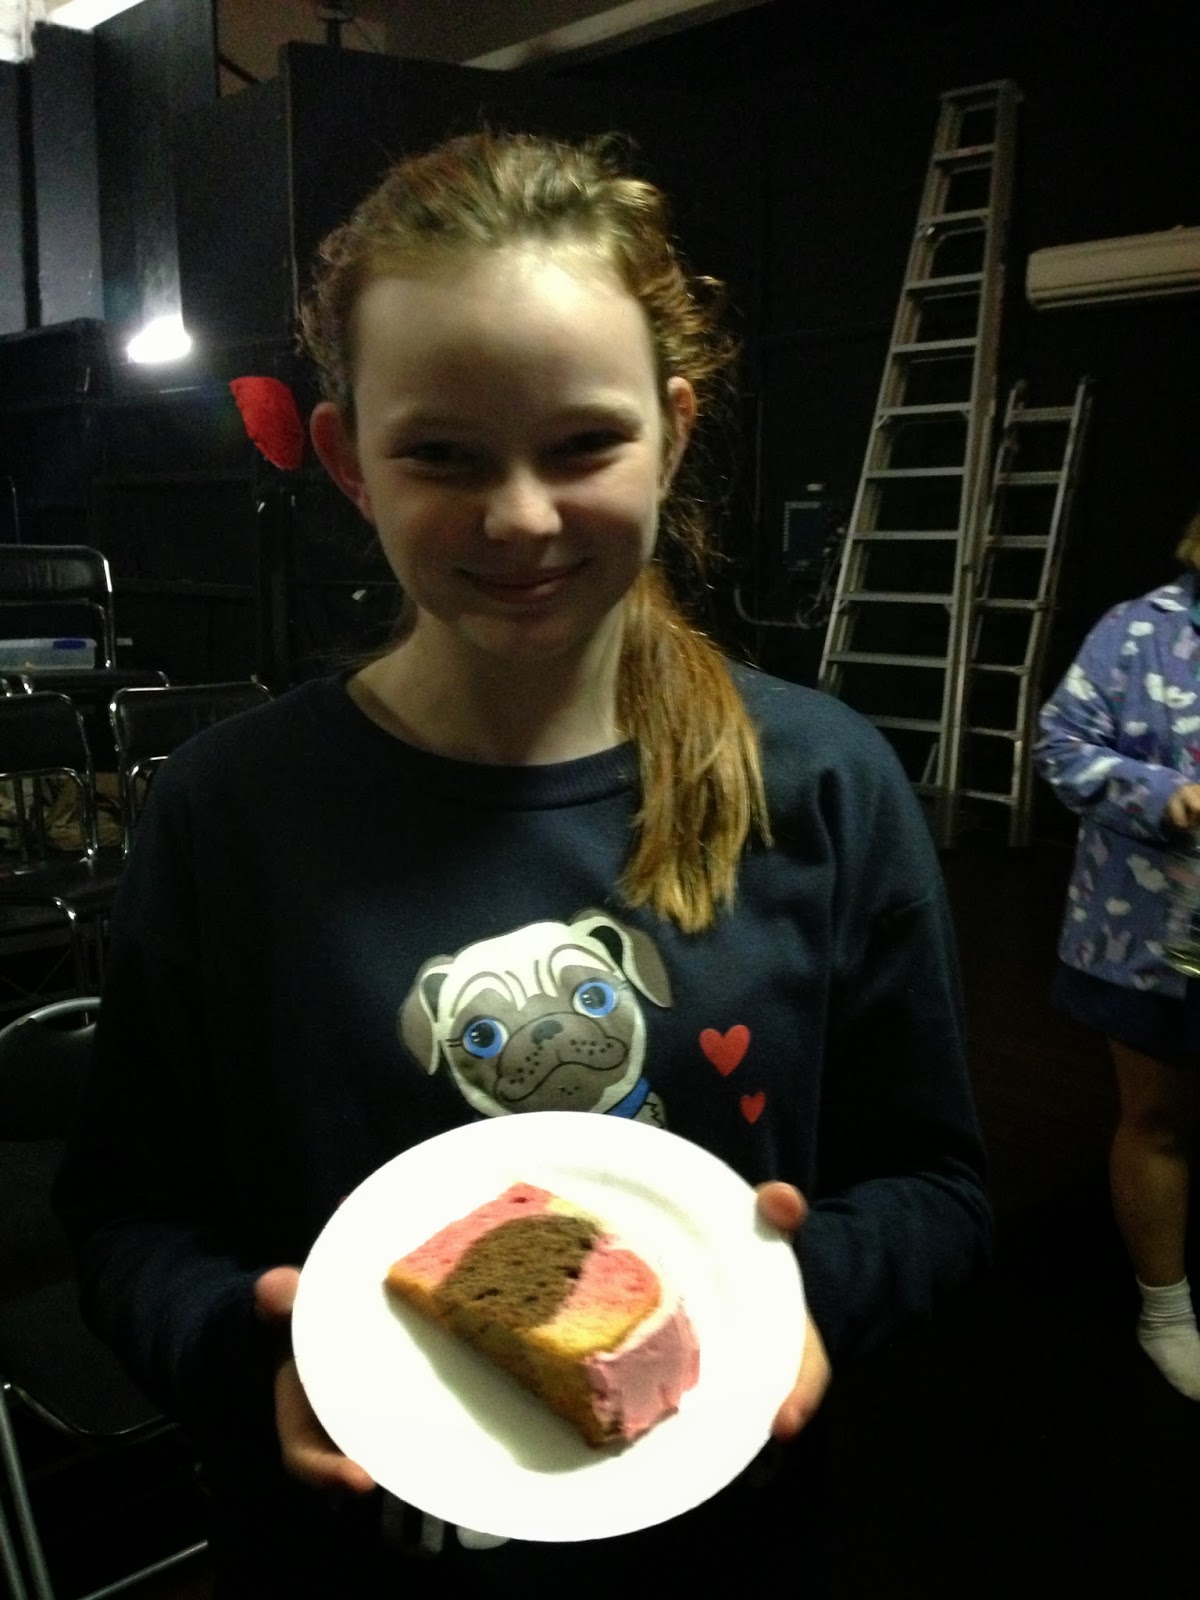
Now during the rehearsal process, one of my students, Chanda, had her birthday. The actual day of her birthday we had a 4 and a half hour rehearsal in the night. It felt I had to give her a cake to make up for it. I always have a massive amount of bookmarks for recipes on my computer, so I looked through and remembered a recipe I found on the cadbury kitchen website for a marble cake. I knew I'd found my cake with the addition of some buttercream icing.

It's funny how this cake looks like it would be hard to make, but is really quite easy. This is a great cake to make and take somewhere - people will think you're a baking wizard. Have a go and remember to send me your pic - I love to see what people have done with the recipes.


Cake originally from:

INGREDIENTS:

Cake:
125 grams Unsalted Butter, softened
3/4 cup Caster Sugar
2 Eggs
1 teaspoon Vanilla Extract
2 cups Self Raising Flour
3/4 cup Milk
2 tablespoons Cocoa, sifted
1 tablespoon Milk (extra)
Pink Food Colouring

Icing:
125 grams Unsalted Butter, softened
80 grams Icing Sugar, sifted
1 teaspoon Strawberry Essence
Pink Food Colouring
Silver Decorating Balls


DIRECTIONS:

1 - Preheat the oven to 180°c and grease and line a round springform tin.

2 - Cream together the butter and sugar until light and fluffy.

3 - Add the eggs and vanilla and beat well.

4 - Fold in the flour alternatively with the milk.

5 - Divide the mixture evenly into three bowls. Add the cocoa and extra milk to one, the pink food colouring to another, and leave one as is.

6 - Spoon the mixture into the prepared tin, layering the colours.

7 - Bake in oven for 45 minutes or until a skewer comes out clean.

8 - Cool for 10 minutes in pan before turning onto a wire rack to cool completely.

9 - For the icing, cream the butter and icing sugar until creamy.

10 - Add in the essence and colouring and beat until evenly distributed.

11 - Liberally spread across cake and sides and add the decorations.

12 - Serve and enjoy.

Catch you again soon for my most popular muffins.

Wayne
xx


Tuesday, 20 August 2013

Birthday Letter Cake - Butter Cake with Strawberry Infused White Chocolate Ganache


BIRTHDAY LETTER CAKE - BUTTER CAKE WITH STRAWBERRY INFUSED WHITE CHOCOLATE GANACHE

So I am a pretty big Madonna fan, by pretty big I mean, massive. I like to have a small party for her every year. It's a great excuse to pure some wine, get together with my friends and make some baked goods. I made a number of delightful baked goods this year I'll be posting over the next week. I was keen to try a special cake. I thought I'd make a big "M", this means that others can use the recipe and a letter cake of their own for themselves or a loved one. Now I'm not the neatest decorator, but I give it a good go. And I was pretty happy with the result. You can adjust it yourself for whatever letter you need.

This was a standard butter cake but I replaced the vanilla essence for some strawberry essence and just swirled some red food colouring through the batter. The ganache was the real fun. I infused some cream with fresh strawberries, and it gave the ganache a distinct flavour. I was really happy with it and will definitely experiment with other flavour infused ganache.

This cake is a good recipe for a nice afternoon tea as well. To make enough cake for the large letter cake I made a double batch.

INGREDIENTS:

Buttercake:
185g Unsalted Butter, softened
1 cup Caster Sugar
1 teaspoon Vanilla Essence (or strawberry essence)
3 large Eggs
2 cups Self Raising Flour
1/4 cup Milk
optional Red Food Colouring

Ganache:
300ml Thickened Cream
180g White Chocolate, cut roughly and finely
1/4 cup Strawberries, chopped

Buttercream Edging:
80g Salted Butter, softened
80g Icing Sugar, sifted
Food Colouring

 DIRECTIONS:

Buttercake:
1 - Preheat oven to 180°c and grease cake tins. (I used three loaf pans)
2 - In a large bowl, beat the butter, sugar and essence together with an electric beater until light and creamy.
3 - Add the eggs one at a time and beat well after each addition.
4 - Sift the flour over the mixture alternatively while adding the milk, a third at a time. Stir in lightly until each are mixed.
5 - Spoon in batter into prepared tin/s. You can then add in the food colouring and mix in.
6 - Cook for 50 minutes or until ready (if using smaller pan, make sure you don't overcook).
7 - Cool in pan slightly before cooling completely on wire rack.

Ganache:
1 - Chop up strawberries and mix with cream. Cover and place in the fridge overnight.
2 - Pour cream through a strainer into a small bowl, pressing the strawberries gently to get more flavour through.
3 - Heat cream in a saucepan and slowly bring to a boil.
4 - Pour cream over the chopped chocolate and let it sit for 2 minutes before stirring. (If chocolate doesn't melt, place bowl over another bowl of boiling water and stir until smooth.
5 - Place ganache in fridge until it thickens to desired consistency. Stir occassionally.
6 - Cut cakes into desired shapes and spread ganache over the top. Clean excess ganache from the plate.

Buttercream:
1 - Cream butter and icing cream together until thick and creamy.
2 - Add in colouring, to make purple I used red and blue food colouring, and beat until well combined.
3 - Put the buttercream into a sandwich bag and cut off end. Outline the lettering to make the border.

Place cake in the fridge to set.

This is a fun cake that is tasty and lasts well for a few days. I'll be back on Thursday with the amazing wagon wheel slice that went off a treat on the weekend.

Wayne
xx

Sunday, 4 August 2013

Coca Cola Chocolate Cake


COCA COLA CHOCOLATE CAKE

Here's part two of the birthday cakes I cooked last weekend for friend's birthdays. This one was one of my boyfriend's closest friend's, Elyse, who's also become a great friend of mine. Now Elyse loves a drink of Coke, we joke she's addicted. Now I had heard you could put Coke in cakes and it tastes great, but hadn't tried it. This was my chance to have a go, and wow it was worth it. This is one of the best cakes I've made in a longtime. The Coke made the cake light and fluffy, and combined with my standard ganche recipe, it was perfect. I always know when the cake is good because it goes fast. We cut the cake up and everyone had a slice and ate it all - a sure sign the cake was a hit. People said they had hints of coke as they ate it. So have a go at this cake and I know you'll love it.


There's a few things I want to try over the next few weeks, experiment a little. Some may work, some may not. So I look forward to sharing the successes with you.


INGREDIENTS:

For the cake:
1 1/2 cups Marshmallows
1/2 cup Oil
1/2 cup Margarine
3 tablespoons Cocoa
1 cup Coke
1 teaspoon Bicarbonate of Soda
2 Eggs
1 1./4 cups of Sugar
1 teaspoon Vanilla Essence
1/2 cup Buttermilk
2 cups Self Raising Flour

Ganache:
400g Milk Chocolate, roughly chopped
300g Thickened Cream
Lolly Coke Bottles to decorate


DIRECTIONS:

1 - Preheat oven to 160°c and grease line a springform tin with baking paper.

2 - Place marshmallows, oil, margarine, cocoa and Coke in a saucepan and heat and stir on medium heat until melted.

3 - Mix in bicarbonate soda.

4 - Beat flour, sugar, eggs, vanilla essence and buttermilk.

5 - Mix all ingredients together, including flour, and pour into springform tin. The mixture will be runny, so don't worry.

6 - Bake for one hour or until cake bounces back or skewer comes out clean.

7 - Let cool in pan. When cool, cut in half, ready to ice.

8 - To prepare the ganache, place cream in a small saucepan over a medium heat and bring just to boil.

9 - Remove from heat and pour over chopped chocolate (in a heatproof bowl). Leave for 5 minutes and then whisk mixture together. Chill in fridge, stirring every few minutes until it gets thicker.

10 - Spread the ganache liberally over the cake and the side. Refridgerate to set.

11 - Top with fizzy Coke bottle lollies and enjoy.

Catch you on Tuesday for the results of my national cheesecake day bake.

Wayne
xx

Thursday, 1 August 2013

Rolo Brownie Cake


ROLO BROWNIE CAKE

I just had a massive weekend of birthday celebrations. It seems like a ridiculous amount of us were born in July, me included. Lately as a present to my friends I've been making them birthday cakes. I had two good friends with birthdays last week, so made two lovely cakes (will share the other on the weekend). This cake, the Rolo Brownie Cake, was one I've wanted to make for a while. It's from my favourite blog, Raspberri Cupcakes, and her stuff is always nice - albeit very fattening. Trust me, this is the kind of cake that is divine to eat, but you can't have a lot.

I made it for my friend Jen, a very talented actress and make up artist. She is one of the nicest people I have met since moving to Melbourne. I have directed her twice and have loved getting to know her. I felt very honoured, and very excited to share a small dinner for her special day.

This cake was wonderful to make, I had a lot of fun doing it. The only difficulty I had was with the actual Rolos themselves. I couldn't find the tubes of Rolos, just the block. I rang Nestle, and they told me they didn't makes the tubes anymore. Dumb. Apparently you can get them in import stores still - but I'd left it too late. So I had to do things a little differently. The other different thing to do here is to make your own caramel sauce with a can of condensed milk. This was great and it turned out perfectly.

So have a go at this fun cake, but make sure you share it or you may just explode!

Original recipe from: http://www.raspberricupcakes.com/2012/04/rolo-chocolate-brownie-cake.html

INGREDIENTS:

For the Cake:
400g Salted Butter
200g Dark Chocolate, coarsely chopped
4 Large Eggs
200g Caster Sugar
200g Plain Flour
1 block of Rolo Chocolate
1 can of Condensed Milk

For the Icing:
400g Milk Chocolate, coarsely chopped
300ml Thickened Cream
1 block of Rolo Chocolate


DIRECTIONS:

1 - First you need to make the caramel sauce for the filling. Take the unopened can of condensed milk and remove the label completely. Place in a medium saucepan and fill with water until it is half to 3/4s of the way up to the side of the can. Cover with lid and boil over a medium heat for two hours. Check regularly and top up with water if it falls below half. WARNING - if the water runs out the can will explode. Please don't let that happen (I'll feel really bad). Let it cool, and then put in fridge until you need it. (Will look like pic above)

2 - Preheat oven to 150°c and grease and line 2 springform tins (if like me you only have one, you'll have to take turns cooking them).

3 - Melt butter and chocolate in a heatproof bowl over a saucepan of simmering water. Stir occasionally until smooth.

4 - Whisk eggs and caster sugar in an electric mixer until thick and pale (about 3-5 minutes), fold through chocolate mixture and then fold in flour until just combined.

5 - Pour half the batter in the two pans. Smooth the top and then spread half of the Rolo block to the top of each cake mix.

6 - Bake for 25-30 mins, until cake is firm to touch.

7 - Cool completely in pan before carefully transferring to serving dish. As it's a brownie cake it will crumble easily.

8 - Open caramel tin and add some salt. Use beater to smooth the caramel and mix salt. Then spread completely over the top of one of the cake pieces. Put in fridge for at least half an hour, to make sure it sets.

9 - Carefully sandwich the second cake on top.

10 - To prepare the ganache, place cream in a small saucepan over a medium heat and bring just to boil.

11 - Remove from heat and pour over chopped chocolate (in a heatproof bowl). Leave for 5 minutes and then whisk mixture together. Chill in fridge, stirring every few minutes until it gets thicker.

12 - Spread the ganache liberally over the cake and the side. Break up rolo block and place on top. Refridgerate to set.

13 - Serve and enjoy.

On the weekend, the Coke Chocolate Cake will be put on the blog.

Wayne
xx


Tuesday, 16 July 2013

Red Velvet Cheesecake


RED VELVET CHEESECAKE

So we all know by now that I LOVE to bake. The joy of baking is about the sharing. Sure I enjoy to taste what I've eaten, but mostly my joy comes from other people eating my baking wares and enjoying them. So I am always chuffed when people ask me to bake for them. My friend Steph was having a birthday party and asked if I'd make her a cake. I didn't even need to think about it, of course I would. I asked her what she liked and she rattled off a few things, but the two which stuck were red velvet and cheesecake. Now I found a recipe I had been wanting to try that combined the two - this was my chance to try it.

Now the cake was a smash, it was all gone within minutes of being cut. I'm a little upset with myself that I didn't get better pictures of the cake because it was beautiful (even if I do say so myself). The cake was tasty, and the cheesecake was creamy and a perfect partner. I will definitely be making this one again! It is a little fiddly, and takes some time, but is worth it. So make sure you do what I did, and make it the day before you need it. It can use that extra time in the fridge to keep everything set and just make the icing the morning before the party.


This recipe was originally from Taste, here is the link:

INGREDIENTS:

Cake:
185g butter, softened
155g caster sugar
2 eggs
115g self raising flour, sifted 
40g plain flour, sifted
2 tablespoons of cocoa powder
1/4 teaspoon of bicarb soda
1/2 cup of buttermilk
Red food colouring (I used a gel bottle)
Oil, for greasing
White chocolate to top cake with

Cheesecake Filling:
250g cream cheese, room temperature
70g caster sugar
2 tablespoons of freshly squeezed lemon juice
2 tablespoons of warm water
1 1/2 tsp gelatine powder
300ml thickened cream

Cream Cheese Frosting
250g cream cheese, at room temperature
60g unsalted butter, softened
80g icing sugar, sifted
1/4 teaspoon of vanilla extract

DIRECTIONS:

1 - Preheat oven to 180°C and spray a round 22cm (base measurement) cake pan with canola spray. Also line the base with non-stick baking paper.

2 - Use an electric beater to beat butter and sugar in a bowl until pale and creamy. Add eggs, 1 at a time, beating well after each addition.

3 - Combine the self-raising flour, plain flour, cocoa powder and bicarbonate of soda in a bowl. Stir flour mixture and buttermilk, in alternating batches, into butter mixture. Stir in food colouring.

4 - Spoon mixture into pan. Bake for 35-40 minutes or until a skewer inserted into centre comes out clean. 

5 - Cool slightly. Transfer to a wire rack to cool completely.Cut cake in half horizontally. Trim the top if the middle has risen too much.

6 - To make the filling, use an electric beater to beat cream cheese, sugar and lemon juice in a bowl until smooth. 

7 - Place the water in a heatproof jug or bowl. Add the gelatine. Place the jug in a saucepan and add boiling water to come halfway up the side of the jug. Stir until the gelatine dissolves. Add to the filling and beat until combined.

8 - Use an electric beater to beat the cream in a bowl until soft peaks form. Fold into the cream cheese mixture.

9 - Brush your cleaned and cool cake pan with oil. Line base and side with plastic wrap, allowing side to overhang. Place cake base, cut-side up, in pan. Spread with filling. Top with cake top. Fold over plastic wrap. Place in the fridge overnight to chill.

10 - To make the frosting, use an electric beater to beat the cream cheese, butter, sugar and vanilla in a bowl until well combined. Turn cake onto a serving plate. Spread with frosting. Decorate with chocolate curls, or shaved chocolate as I did.

11 - Enjoy

Been baking a lot lately for various people, so will lots coming over the next weeks. Remember, if you have a request, let me know and I'll have a go!

Wayne
xx 

Saturday, 13 July 2013

Bakes from my birthday - a love letter to Raspberri Cupcakes


BAKES FROM MY BIRTHDAY - A LOVE LETTER TO RASPBERRI CUPCAKES

So it was my birthday recently, 38. Yes, I'm getting old. I had a few friends round to help celebrate which was wonderful. As a former Sydney boy who's only been in Melbourne 2.5 years, I feel very blessed to have made such great friends. Especially generous ones, the presents were incredible - including a brilliant new coffee machine that I'd marry if I could. And it was very lucky my Mother was able to make the trip down. She has not been very well at all. Loved having Mum here and was extra happy I was able to share with her my newish baking skills and how they've evolved.


Now baking is a really Melbourne thing for me, I have a bigger kitchen than I did in Sydney. (Any Sydney friends will know how small my Newtown box was). Part of my evolution as a baker has been about getting baking crushes on other bakers through their blogs. My favourite is definitely Steph from Raspberri Cupcakes. Her bakes are divine and I have been making her stuff for a while. A few I often get requests for are the Spiced Blondies with Chai Infused Ganache, the Cherry Shortbread Bites and the Malted and Salted Choc-Chip Cookies. I knew I wanted to make some of her bakes for my birthday, so I did. I'll share with you what they are. Now her recipes are so good I never need to change ingredients. I don't want to steal from her, so instead I'll post links to the recipes. Plus please check out all her recipes and amazing pics. She is a Baking God and you will be salivating. Friends, I will take requests if you want me to bake more of her stuff.


Now the first one was the birthday cake. My good friend Hannah said I shouldn't make my own cake, but I really wanted to. Mostly to make this great cake. Steph's original recipe was a purple ombre cake, but I decided to make a rainbow cake instead. Gay much? The recipe was the same, all I changed were the colours and I made 4 layers like she suggested in the recipe. Now the sprinkles task was difficult, especially when I only had a few minutes till people started arriving, but it was worth it. It looked amazing.

Here's the recipe link:


Next up are the Neopolitan Melting Moments, or Yo-Yo's as they are called here in Melbourne. I had been wanting to make these for a while. I love how the melting moments, melt in your mouth. Hence the name. And the different flavours in these just sounded wonderful, and they were. Yes, they took a while to make, but were worth it. Out of all my birthday baked goods, these were the ones I was keenest to try. I changed nothing, the recipe was spot on.

Here's the link:
http://www.raspberricupcakes.com/2010/06/neopolitan-melting-moments.html


Finally there was the lemon meringue cheesecake. I made this for my boyfriend's birthday this year. It's the trend to make a cheesecake for him for his birthday, he loves them. Last year was the apple pie cheesecake, this year was the lemon meringue one. Mum loved the sound of it and asked me to make it for her when she was down. Of course I couldn't say no to my favourite person, and happily made it again. Plus, it's bloody tasty. The combination of lemon meringue and the cheesecake is a perfect match. I highly recommend this for your next dinner party. Again, I changed nothing from the original Raspberri Cupcakes recipe.

Here's the link:
http://www.raspberricupcakes.com/2009/05/lemon-meringue-cheesecake.html


The party was a success, as were the baked goods. There were a few other things I made I may share soon too. But I really want to write this blog to say thanks to Steph at Raspberri Cupcakes for inspiring me and pushing my baking to new heights. I look forward to seeing more of your amazing creations.

Back on Monday with the red velvet cheesecake my friends have been asking me to share.

Wayne
xx